A Resin Bound Driveway system is not just a surface, it’s a long-term investment in your property. Its flexibility, sturdiness, and low maintenance make it a superior choice compared to other surfaces. To fully enjoy these benefits, it’s crucial to install a resin bound driveway accurately from start to finish
This article will guide you through the pivotal stages of placing resin bound driveways. However, it’s important to remember that you’re not alone in this process. Reputable suppliers are there to provide training and assistance, ensuring you feel supported and confident in your installation. The technique displayed here can likewise be utilized for other applications, such as resin paths and patios.
What is resin bound?
Resin Bound Driveway surfaces utilize liquids that harden to stick small decorative stones together. Different colored resins and rock mixtures can create unique patterns. Once dried, the resins firmly grip the stones, forming durable flooring.
The finished Resin Bound Driveway floor is very hard yet remains smooth. It withstands weathering from rain and sun, along with daily traffic. Minimal maintenance is needed, as spills cannot harm its bond. Regular cleaning is simply with water.
What can Resin Bound Driveway be used for?
Resin Bound aggregates serve as an adaptable overlay applicable in various zones. Due to their durability for vehicular and foot traffic, they are often applied to driveways and pathways.
- Driveways
- Paths
- Patios
- Parks & Gardens
- Concourses
- Car Parks
- Cycle Paths
- Terraces
- Bridges
- Schools
- Towpaths
Recommended bound driveway mix Specification
Creating a high-quality, long-lasting surface is within your reach. The key lies in your hands, in the proper selection of resin and aggregate. A typical mix uses epoxy resins for their strength and durability in outdoor conditions. Play sand or decorative stones ranging from 1 to 5mm ensure the design has texture and visual appeal. By making these choices wisely, you’re empowering yourself for a successful installation that will stand the test of time.
The resin is applied at around 45kg per square meter to thoroughly coat the aggregate, forming a barrier against moisture and impacts. More resin can be added for heavier-duty areas. Curing times vary by resin type, but 3 to 24 hours ensures a fully hardened finish. Proper testing picks materials suited for the project’s needs and location.
How to calculate the amount of dried aggregates you need
Calculating aggregate needs is essential to avoid waste or shortage. First, measure the whole project area in square meters. Then, an estimate of roughly 20kg of dried aggregate per square meter is typically required.
For example, a 10-square-member patio would need 10 x 20kg = 200kg of aggregate. Estimating a bit more is always safer, as some may get lost. Have extra resin on hand to thoroughly coat aggregates spread on site. Proper planning at this stage helps the installation go smoothly.
Before you start installing a resin driveway
Thoroughly preparing the area before starting is crucial for a successful resin driveway installation. This includes removing any plants or debris that could interfere with the work. Consider applying a primer to nonporous spots to enhance resin adhesion, ensuring a robust and long-lasting surface.
Mark out the design if you have a specific plan in mind. It’s easier to follow lines when pouring than making adjustments later. Gather all needed materials and tools, such as brooms, rakes, and resin mixing equipment. A test mix helps confirm the correct resin-to-aggregate ratio. The organization makes the process efficient.
Ensuring the base is clean and solid avoids potential issues later. Also, check that any downhill slope allows for proper water drainage. Masking tape protects nearby edges from spills. Having everything ready upfront saves trouble during installation. I am taking time to prepare the frontloader for the work, leading to a better-finished product.
Preinstallation: Preparation
Before laying resin, the porous tarmac base must be clean and stable. Sweep away debris to give the resin a smooth bed. Check for proper drainage and slope of the surface area. It’s also essential to protect nearby grass or plants from spills. Mask off the edges with tape. A test mix allows the resin mixture to be checked before pouring fully.
This keeps the real installation stress-free. Proper preparation forms a strong foundation. Inspect the base for gaps or weak spots and make repairs. Gather tools, resin, and aggregate as per calculations. With the site ready, the actual installation can proceed smoothly.
What bases are suitable for a resin driveway?
Concrete is an excellent base as the resin will bond very well. Ensure the concrete is free of debris, dried, and given 28 days to cure thoroughly. Even cracked concrete can be repaired first. Compacted hardcore or stone is commonly used after being well-tamped down and rolled. This provides a stable, flat surface for the grid for laying Resin Bound Driveway Gravel to set on.
The base must be dry with no loose stones. Properly prepared asphalt can also work, though joints may telegraph. Granular subbases like compacted gravel work provided edges are contained. Good preparation of any base creates a durable resin driveway edging. Appropriate foundations for a DIY Resin Bound Driveway system include the following:
- Macadam
- Asphalt
- Concrete
- C52 sand
- SUDwell
Final checks before installing a resin driveway
- Sweep the area thoroughly to remove any loose debris or dirt. Check that the base is clean, dry, and stable.
- Do a final inspection for cracks, holes, or unevenness that may need repairing.
- Place temporary markings for edge joints or designs to help pouring go smoothly.
- Lay protective masking tape along any edges to prevent spills where not wanted.
- Double-check that resin and aggregate quantities are sufficient to complete the task.
- Ensure all tools needed are on site, like brooms, mixing equipment, and portable lights if working at night.
- Carry out a final test mix to confirm resin and hardener proportions.
- Put on any necessary protective wear like gloves, masks, and eyewear.
- Ensure the work area remains dry and does not get disturbed during curing.
- Weather resin may not cure properly in wet, cold, or hot conditions. Reschedule if needed.
Step 1. How to mix the resin
When mixing the resin, carefully measure the amounts of resin and hardener according to the manufacturer’s instructions. Pour the hardener into the resin container and use a slow mixing stick to blend the two components thoroughly for at least 3 minutes.
Be sure to scrape the sides and bottom frequently to ensure an even combination without unmixed pockets. Most resins need slow, deliberate stirring to avoid introducing air, which can cause bubbles.
First, it is a good idea to do a test mix to confirm that the resin and hardener fully integrate smoothly. An electric drill mixer may be required to blend more enormous volumes adequately for more prominent pores. Also, continue to scrape the sides regularly during the process. Mix as much resin as can be applied within the pot life, typically 3045 minutes. Short or incomplete mixing could result in soft or tacky spots once cured.
Clearly label the mixed resin containers and set them aside to prevent confusion later during application. Clean any spills or tools using the solvent provided per the manufacturer’s instructions. Thorough mixing is essential for fully curing resin to achieve strength and performance.
How do we change the curing speed?
Resin curing speed depends on temperature. Heat speeds it up, while cold slows it down. Adjust cure control additive amounts as instructed. Proper protection from moisture is also vital. Curing requires dry conditions. Sheltering wet work allows slower control over the process indoors.
You control cure speed, which aids in smooth installation. Changing additive levels or conditions alter how long it takes to finish pouring and troweling the resin. Careful attention gives quality results.
How much accelerator (catalyst) do I need?
Adding an accelerator changes a resin’s curing rate. There are too many speed cures, so that quality may suffer. Too little delays it. Test small mixes first to gauge appropriate amounts in your conditions. Most systems list accelerator levels by resin weight percentages. Resin Container Size Accelerator Amount:
- 5 kg 12% by weight
- 20 kg 0.51% by weight
- 200 kg 0.10.5% by weight
Careful following of manufacturer guidelines prevents issues. Proper accelerator dosing ensures suitable working times and a thorough cure.
Step 2. Mixing resin-dried aggregates and sand
- Once the resin is mixed, pour it out onto the prepared surface.
- Spread it out evenly over the area using a notched trowel or squeegee.
- From one end, carefully sprinkle the dried aggregate evenly (e.g., quartz sand).
- Use a spreader such as a broom or straight edge to level the materials.
- Broom it until fully coated and no dry spots remain.
- For designs using varied-sized aggregates, start with the larger pieces.
- Sprinkle these on after the initial resin distribution.
- Then, add finer material until the gaps are filled. Additional resin may be required.
- Finish with a broom to fully embed and level the surface.
- Inspect the final coat and add extra resin or pieces where needed.
Step 3. Transfer material to the work area
- Pour the mixed resin onto protective sheets near the workspace.
- Use buckets, wheelbarrows, or carts to transport resin and aggregate carefully.
- Properly securing containers prevents spills en route.
- Starting from one end of the area, evenly spread resin using a tool.
- Sprinkle on an aggregate and use a broom to coat and level.
- Check coverage and add more material where required.
Safe handling and organization of the work keep the installation neat and efficient. Small batches also ensure fresh mixes for the best bonding. Proper material transfer is done precisely as needed.
Step 4. Trowelling the material
- After brooming, the next step is to trowel the surface.
- Use a hand trowel to work reinforcement into the top layer.
- This compresses and levels the mix into a smooth, solid sheet.
- Trowel from the center of the area outwards to push any bubbles up.
- Go over the whole surface to achieve an even finish.
- Trowelling more than once may be required for large pores.
- Additional resin can be brushed and applied to any patches before retrial.
- Check for and remove any remaining loose pieces as needed.
- Aim for a tight bubble, free, slip-resistant surface in the final pass.
- Upon cure, no pin holes or hollow spots should remain visible.
They are removed with troweling, resulting in a long-lasting, durable, sealed coating. Multiple passes ensure high-quality compaction.
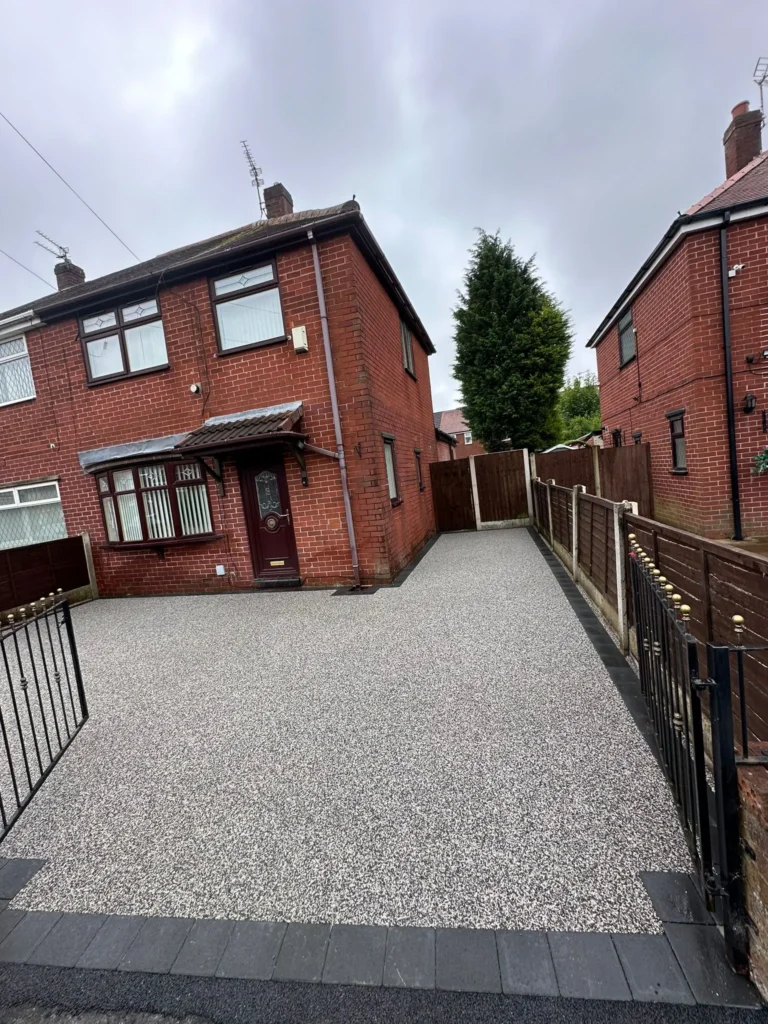
Your customer’s finished Resin Bound driveway
A smooth, crack-free surface offers durability and low maintenance for years. Tire tracks will disappear with time. Pleasure their reactions witnessing the transformation. Quality craftsmanship creates satisfied customers who may refer to new business. Well-executed projects build positive reputations.
Focus on meeting the client’s vision through expertise applied with care. Taking pride generates return customers and word-of-mouth recommendations that support future success.
Resin Bound training and assistance
Training is essential for success in this industry. Seek certification from reputable material suppliers to learn best practices. Their experts provide in-depth courses on resin types, aggregate selection, mixing application methods, and more.
Be bold and ask suppliers for help, too. Experienced representatives can advise on project quotes and system recommendations, troubleshoot installation issues, and answer questions. Ongoing support helps contractors perform at their highest level for satisfied customers now and in the future.
All resin manufacturers offer ongoing education to improve technicians’ skills over time. Private or group classes instill confidence to take on more complex jobs. Supplier partnerships give contracts a competitive edge and peace of mind.
Investing in oneself through formal training and mentorship ensures that Resin Bound Driveway installations remain of the highest caliber. It’s a wise professional move that benefits one’s business and builds strong supplier relationships.
FAQ’s
What are the disadvantages of a resin driveway?
It can be more expensive than asphalt or concrete initially and requires resealing occasionally due to UV exposure.
Is a Resin Bound Driveway expensive?
It can cost more than traditional surfaces upfront but lasts longer.
What is a Resin Bound Driveway?
A hard-wearing surface of polyurethane or epoxy resin mixed with aggregate creates a durable decorative finish.
Conclusion
Resin Bound Driveways provide homeowners with an attractive hardstanding option. While the initial installation cost may be higher than asphalt, Resin Bound Driveway surfaces can last considerably longer and require less maintenance. Owners appreciate how the material strengthens over time and withstands all weather conditions.
When a trained technician installs a Resin Bound Driveway correctly, it becomes a superb investment. The surface does not develop cracks or potholes like other materials. With periodic recoating, a driveway made from Resin Bound Driveway technology can remain in excellent condition for 1520 years. This makes it a cost-effective choice that enhances the appearance of any property throughout its long lifespan. Resin Bound Driveway installation offers homeowners durable, low-maintenance service for many years.